Manual Backup
Although the Automatic Backup is the recommended backup method, a Manual Backup feature is available if you prefer to do it yourself.
It's important to know the differences between Backup and Export as well as Restore and Import. See Backup vs. Export.
Disable the Automatic Backup on the Backup and Files Preferences before running a manual backup.
By default, manual backups are saved to the location shown on the Backup and Files tab of the Preferences dialog box. To change the default location, simply browse to the desired location by clicking Browse in the Backup To: field; then, click OK or Apply in the Preferences dialog box.
To manually backup returns and other data:
- From Return Manager, click the Returns menu; then, click Backup Returns.

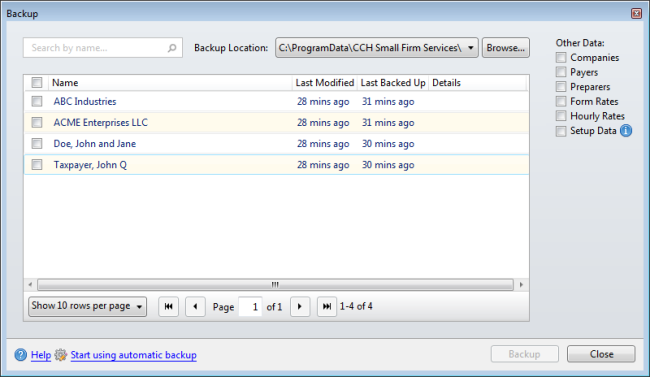
Backup dialog box
- Select the check box(es) for return(s) to be backed up or select the Name check box to select all.
Selecting the Name check box will select all rows shown on the page. Increase the number of rows shown per page in the drop-down list at lower left of the Backup dialog box to select more returns at once.
Enter text into the Search by name... to show only those returns matching the criteria entered.
- Under Other data:, select the check box for Companies, Payers, Preparers, Form Rates, Hourly Rates, and Setup Data as desired to be included in the backup.
- Click Browse to navigate to and select another backup location if desired.
Selecting another location from the Backup dialog box will not change your default backup location. If you want to change your default backup location, you can do so via the Backup and Files tab of the Preferences dialog box or from the Admin Console.
- Click Backup.
- Click Close.
See Also: